Wednesday, 26 July 2017

ASP.NET MVC - Creating Hello World Application with Visual Studio 2017

What this article covers?

- Creating a Project in Visual Studio
- Adding Controller / How to Add Controller?
- Adding a View / How to generate a view from a Controller method?
- Configuring Route / How to configure the default route? 

Creating a Project in Visual Studio

1.      Open Visual Studio

2.     On the File menu select New and then select New Project

3.     You’ll be prompted with the New Project window
4.     Select your programming language and then expand it to get all installed application types under it.
5.     Select Web option.
6.     Select ASP.NET Web Application Template and then enter the name of your application you wanted to create, then click OK.


7.     Click on Empty option to create the MVC application, and then check the MVC checkbox to create the empty MVC folder structure, and then click OK. Now your new ASP.NET MVC project is ready for you.


Adding Controller / How to Add Controller?

1.      Go to Solution Explorer
2.    Right Click on Controllers Folder
3.     Select Add, and then select Controller option

4.     Select an Empty MVC Controller Template and then click on Add.

5.     Enter your controller name (Controller name must end with the suffix Controller), and then click on Add.


6.     Now the controller class will be added to your project along with default Index action method as sown below.


7.     You can change the default controller action. I’m changing it from Index to HelloWorld.


Adding a View / How to generate a view from a Controller method?

1.      Right click on Index action method in controller, then select Add View option.

2.     The view name and controller name should be the same. So, don’t modify the default name. Uncheck ”Use a Layout Page” option, because we don’t have any layout page in our application, and then click on Add.
3.     Now the view will be added to your application. Add some welcome text as shown below.
4.


5.     Now your Controller and View are ready.


Configuring Route / How to configure the default route?  

Routing enable us to define URL pattern that maps to the request handler.
Every MVC application must configure (register) at least one route, which is configured by MVC framework by default. You can register a route in RouteConfig class, which is in RouteConfig.cs under App_Start folder. The following figure illustrates how to configure a Route in the RouteConfig class.

Modify the route parameters according to your Controller and View.
            

Now your view is configure as the default view for your application.
Run the application to see the output in browser.

AngularJS - Overview


- AngularJS is a JavaScript framework developed by Google.

- AngularJS empowers the traditional HTML by extending its current vocabulary.

- AngularJS is open source, client-side JavaScript framework that promotes a high-productivity web development experience.

- AngularJS applications are built around a design pattern called Model View Controller (MVC).

- AngularJS used in Single Page Application (SPA) development projects. 

- AngularJS extends HTML DOM with additional attributes and makes it more responsive to user actions.

- AngularJS is a part of new generation libraries and frameworks that came to support the development of more productive, flexible, maintainable, and testable web applications.


What You Should Already Know?

  You should be familiar with the basics of web development.

  • HTML
  • CSS
  • JavaScript
  • JSON

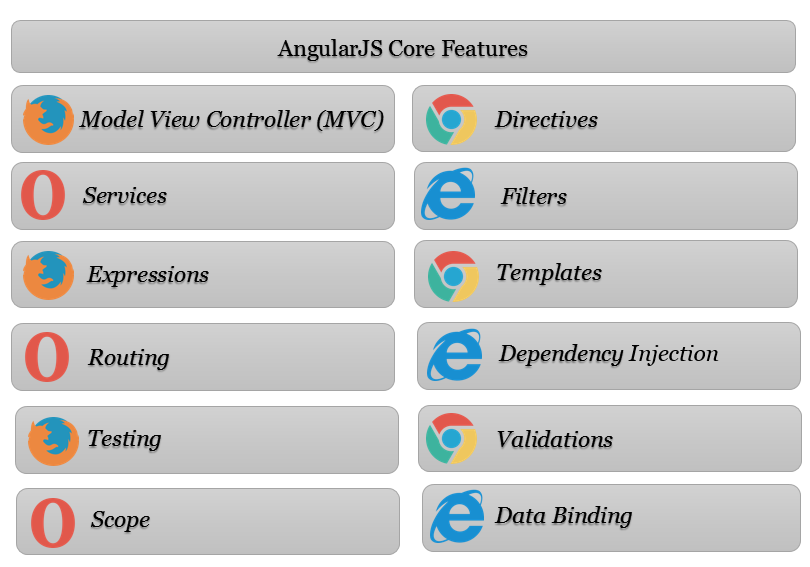
AngularJS Core Features


Model
The data shown to the user in the view
View
Responsible for displaying data to the user
Controller
Contains the business logic
Directives
Extends HTML with custom attributes and elements
Services
Reusable business logic independent of views
Filters
Formats the value of an expression for display to the user
Expressions
Binds application data to HTML
Templates
HTML with additional markup
Routing
Loads a single HTML page and dynamically updates that page as the user interacts with the web app
Dependency Injection
Simplifies the process of dealing with dependencies
Testing
It has many features which makes testing your applications easy
Validations
Offers client side validation
Scope
Object which helps in exchanging the data between controller and view.
Data Binding
Automatic synchronization of data between the model and view components

Wednesday, 19 July 2017

C#.NET - Code Snippet to Generate Random Numbers without Repetition

         /// <summary>
        /// Get Random Numbers without repet
        /// </summary>
        /// <param name="minRange">Minimum Value</param>
        /// <param name="maxRange">Maximum Value</param>
        /// <param name="count">Limit Count</param>
        /// <returns></returns>
        private static List<int> GetRandomNumbers(int minRange, int maxRange, int count)
        {
            Random randomGenerator = new Random();

            List<int> randomList = new List<int>();

            for (int i = 0; i < count; i++)
            {
                var number = randomGenerator.Next(minRange, maxRange);

                if (!randomList.Contains(number))
                {
                    randomList.Add(number);
                    if (randomList.Count>= maxRange)
                    {
                        break;
                    }

                }
                else
                {
                    i--;
                    continue;
                }
            }

            return randomList;
        }

How to call:

List<int> randomNumbers = GetRandomNumbers(0, 100, 10);

Monday, 25 August 2014

SQL Server - Remove or Truncate or Subtract hours, minutes, seconds and milliseconds from sql datetime


While working on SQL Datetime sometimes we may get a requirement to subtract hours, minutes, seconds and milliseconds from sql datetime. We can do it by using the following code snippet.

Remove/Truncate/Subtract hours, minutes, seconds and milliseconds from sql datetime

SELECT GETDATE()
-- 2014-08-25 13:19:13.157

SELECT CONVERT(DATETIME,CONVERT(char(10), GetDate(), 120))
-- 2014-08-25 00:00:00.000

SELECT
          DATEADD(MILLISECOND,(0-DATEPART(MILLISECOND,GETDATE())),
          DATEADD(SECOND,(0-DATEPART(SECOND,GETDATE())),
          DATEADD(MINUTE,(0-DATEPART(MINUTE,GETDATE())),
          (DATEADD(HOUR,(0-DATEPART(HOUR,GETDATE())),GETDATE())))))
-- 2014-08-25 00:00:00.000

Tuesday, 22 July 2014

SQL Server 2005/2008 - Working with datetime Data Type (DATENAME, DATEPART, DATEDIFF, DATEADD, ISDATE, CONVERT)


When we are working with any programming language we need to work on the datetime. Every geographic location has different need of the date formats. Developer needs to take care of the datetime formats. The following statements are the most useful and common DateTime functions which are useful in SQL Server 2005/2008. I am giving with some example sql queries with the outputs.


Working With SQL datetime Data Type

SELECT
GETDATE(), -- 2014-07-23 00:48:46.663
CURRENT_TIMESTAMP, -- 2014-07-23 00:48:46.663
GETUTCDATE(), -- 2014-07-22 19:18:46.663
DAY(GETDATE()) , -- 23
MONTH(GETDATE()) , -- 7
YEAR(GETDATE())  -- 2014


--DATENAME

SELECT
DATENAME(year, getdate()) -- 2014
,DATENAME(month, getdate()) -- July
,DATENAME(day, getdate()) -- 23
,DATENAME(dayofyear, getdate()) -- 204
,DATENAME(weekday, getdate()) -- Wednesday
,DATENAME(hour, getdate()) -- 0
,DATENAME(minute, getdate()) -- 53
,DATENAME(second, getdate()) -- 57
,DATENAME(millisecond, getdate()) -- 140


--DATEPART

SELECT
DATEPART(year, getdate()) -- 2014
,DATEPART(month, getdate()) -- 7
,DATEPART(day, getdate()) -- 23
,DATEPART(dayofyear, getdate()) -- 204
,DATEPART(weekday, getdate()) -- 4
,DATEPART(hour, getdate()) -- 0
,DATEPART(minute, getdate()) -- 53
,DATEPART(second, getdate()) -- 57
,DATEPART(millisecond, getdate()) -- 140


-- DATEDIFF

DECLARE @startdate  DATETIME
SET @startdate = '2014-08-15 10:10:10.100'
DECLARE @enddate DATETIME
SET @enddate = '2014-08-20 20:20:20.200';
SELECT
DATEDIFF(year, @startdate, @enddate) , -- 0
DATEDIFF(month, @startdate, @enddate) , -- 0
DATEDIFF(hour, @startdate, @enddate) , -- 130
DATEDIFF(minute, @startdate, @enddate) , -- 7810
DATEDIFF(second, @startdate, @enddate) , --468610
DATEDIFF(millisecond, @startdate, @enddate)  --468610100


-- DATEADD

DECLARE @datetime datetime
SET @datetime = '2014-01-01 01:01:01.110'
SELECT DATEADD(quarter,4,@datetime) -- 2015-01-01 01:01:01.110
SELECT DATEADD(month,13,@datetime) -- 2015-02-01 01:01:01.110    
SELECT DATEADD(dayofyear,365,@datetime) -- 2015-01-01 01:01:01.110
SELECT DATEADD(day,365,@datetime) -- 2015-01-01 01:01:01.110     
SELECT DATEADD(week,5,@datetime)-- 2014-02-05 01:01:01.110
SELECT DATEADD(weekday,31,@datetime) -- 2014-02-01 01:01:01.110
SELECT DATEADD(hour,23,@datetime) -- 2014-01-02 00:01:01.110
SELECT DATEADD(minute,59,@datetime) -- 2014-01-01 02:00:01.110
SELECT DATEADD(second,59,@datetime) -- 2014-01-01 01:02:00.110
SELECT DATEADD(millisecond,1,@datetime) -- 2014-01-01 01:01:01.110


--ISDATE

SELECT ISDATE('2014-12-30 01:01:01.001')  -- 1
SELECT ISDATE('12-30-2014 01:01:01.001')  -- 1
SELECT ISDATE('30-12-2014 01:01:01.001')  -- 0
SELECT ISDATE('2014/12/30 01:01:01.001')  -- 1
SELECT ISDATE('12/30/2014 01:01:01.001')  -- 1
SELECT ISDATE('30/12/2014 01:01:01.001')  -- 0
SELECT ISDATE(NULL)  -- 0
SELECT ISDATE('')  -- 0
SELECT ISDATE('SRINU')  -- 0


-- CONVERT

DECLARE @INPUTDATE DATETIME
SET @INPUTDATE='2014-12-30 12:59:59'

SELECT CONVERT(VARCHAR(10), @INPUTDATE, 105) , '[dd-mm-yyyy]'
-- 30-12-2014  [dd-mm-yyyy]
SELECT CONVERT(VARCHAR(10), @INPUTDATE, 110), '[mm-dd-yyyy]'
-- 12-30-2014      [mm-dd-yyyy]
SELECT CONVERT(VARCHAR(10), @INPUTDATE , 120), '[yyyy-mm-dd]'
-- 2014-12-30      [YYYY-MM-DD]

SELECT CONVERT(VARCHAR(10), @INPUTDATE, 103) ,' [dd/mm/yyyy]'
-- 30/12/2014    [dd/mm/yyyy]
SELECT CONVERT(VARCHAR(10), @INPUTDATE, 101) ,'[mm/dd/yyyy]'
-- 12/30/2014    [mm/dd/yyyy]
SELECT CONVERT(VARCHAR(10), @INPUTDATE, 111) ,'[yyyy/mm/dd]'
-- 2014/12/30    [yyyy/mm/dd]

SELECT CONVERT(VARCHAR(12),@INPUTDATE, 102),'[yyyy.mm.dd]'
-- 2014.12.30     [yyyy.mm.dd]
SELECT CONVERT(VARCHAR(12),@INPUTDATE, 104),'[dd.mm.yyyy]'
-- 30.12.2014     [dd.mm.yyyy]

SELECT CONVERT(VARCHAR(12), @INPUTDATE, 107) ,'[mmm dd, yyyy]'
-- Dec 30, 2014  [mmm dd, yyyy]

SELECT CONVERT(VARCHAR(8), @INPUTDATE, 108) , '[HH:mm:ss]'
-- 12:59:59         [HH:mm:ss]
SELECT CONVERT(VARCHAR(12), @INPUTDATE, 114) 'HH:mm:ss:fff'
-- 12:59:59:000 [HH:mm:ss:fff]


Thursday, 5 June 2014

C#.NET - How to assign null value to DateTime / Working with nullable DateTime / Assigning null value to DateTime / Setting DateTime to null

Value types are non nullable. Reference types are nullable.

DateTime is a value type. If you try to assign null value to DateTime it will throw compile time error "Cannot convert null to System.DateTime because it is a non-nullable value type."
assign null value to DateTime
DateTime has the default value that is equal to the DateTime.MinValue. You can assign this to DateTime.
Assigning default value to DateTime
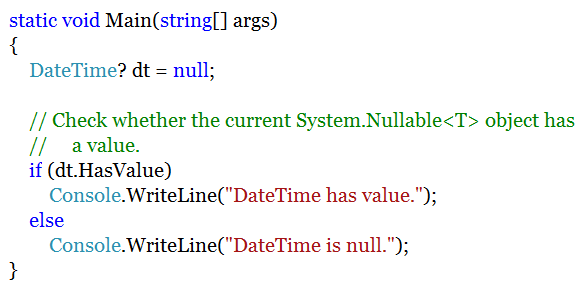
In C# 2.0, Microsoft introduced "Nullable Types" using the nullable operator (?). It will allow you to assign the null values to the value types. So we can assgin a null value to the DateTime by making it as Nullable Type.
Assigning null value to DateTime

Sunday, 25 May 2014

CSS - Style Sheet Media Types


By using the media type rules ( @media ) we can present our web page with a different look in different devices such as screen, print, mobile phone, tablet, etc.

There are different media types defined in the CSS-2 specifications.


Media Type Description
all Used for all media type devices
aural Used for speech and sound synthesizers
braille Used for braille tactile feedback devices
embossed Used for paged braille printers
print Used for printers
projection Used for projected presentations, like slides
screen Used for computer screens
tty Used for media using a fixed-pitch character grid, like teletypes and terminals
tv Used for television-type devices

We can define media types in different ways

1. External Style Sheet associated with single media type.
<link rel="stylesheet" type="text/css" href="print.css" media="print" />
2. External Style Sheet associated with multiple media types.
<link rel="stylesheet" type="text/css" href="print.css" media="print,handheld" />
3. Imported Stylesheets
<style type="text/css" media="print, handheld">
@import "print.css";
</style>
4. Internal Style Sheet associated with single media type.
<style type="text/css" media="print">
h1
{
font-size:16px;
color:Green;
}
</style>
5. Internal Style Sheet associated with multiple media types.
<style type="text/css" media="print,handheld">
h1
{
font-size:16px;
color:Green;
}
</style>
6. Inline style sheets, with the @media rule
<style type="text/css">
@media print
{
h1
{
font-size:16px;
color:Black;
}
}
@media screen
{
h1
{
font-size:18px;
color:Green;
}
}
@media screen, print
{
h1
{
font-size:1.5;
color:Blue;
}
}
</style>